Background

Monday, November 8, 2010

I WANT SNOWFLAKES !!!


Hello friends, In the mist of rearranging my craft room,I happen to run across a half done card, A Christmas card at that. I started this one, sometime ago, one I started and decided I wasn't in the mood to finish or lost my train of "Thought". It's retired , a big block stamp , never used it before and after I stamped out a dozen or so of want-to-bes (cards), I stopped and started on something else. Well I decided to finish it. The stamp on one side  has a large snowflake, on the otherside a smaller snowflake.


I also started this card from the inside out!

Supplies I used:
Stazon White #106960 (comes with a refill)
Stazon Jet Black #101406
Winter Wishes Block stamp( retired)
Grateful Greeting #116511
Various Color of Cardstock
2-way Glue Pen #100425
Clear Embossing Powder #109130
*Embossing Buddy #103083
Dazzling Diamond Glitter #102023

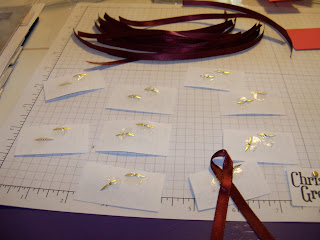
Cut 8x11 cardstock in half to start 2 cards. Stamp using Stazon White, the large snowflake in the inside of card. Allow time to dry before handling.


Emboss the smaller snowflake on the outside of card.


Make sure that you use your "EMBOSSING BUDDY" to prevent static to paper. Thats those messy spots on cards when heated.


As you can see on the blue card the messy embossing powder. I didn't use my buddy. With Glue Pen, color in the snowflake on the outside of card. Apply Dazzling Diamond Glitter. Tap off, set aside to dry.


I punched out the dots for the "i's" in "Christmas Greeting", and used Gold Brads #104337 to highlight alittle...


Cut Real Red cardstock in Strips (2"), Bargain Ribbons 7" long. Take glue dots and place on brads, loop ribbon and attach to back of "Christmas Greeting".


Place on Real Red strips, trim. Use 3 Glue Dots per "Christmas Greeting", place glue dot in middle of ribbon where it crosses.


Trim to frame saying.
Use desired Glue to back and place on desired spot!


So the "Set aside" project that had no idea of whatever it was going to be, finally became "The SnowFlake Card". That's the way too GO! 
Never push a project if the Brain Cells Dies, it can be easily  pick-up at a different time with a "FRESHER" outlook than what you had before!
Until next time........
Harriet


Sunday, November 7, 2010

It's Time Now to "THINK" of "CHRISTMAS'.....


Hey Everybody, Seems like the days are blowing bye, and one of the best holiday of all is creeping up on us soon, very soon! And now with so many different christmas stamp sets that are out, It get really hard on which to decide, specailly if you bought more than 1, that it alone is a headache!. So just take a moment and breathe because its alright and "Who" said you had to do "ONLY 1 "a season!
This will be the first "Christmas Card" out of several that I'll be doing, So I hope you stick around.
Messing around with my "New" Big Shot folder -" TEXTURED IMPRESSIONS" NORTHERN FURRY.I guess I wanted to highlight the impression itself - The Snow Flakes. And this is what I can up with. And to tell you the truth, I'm really not happy with the out come of the card! I think its o.k. not to like your own stuff, cause I really believe that leaves room for a diiferent approach next time. And also with this card it became an "ADD" to it card. Every time I would get done with a step, it just needed something else.I really didn't know what but it did need more...

Riding Hood Red #111348
Rose Red #102544
Bravo Burgundy # 105723
Whisper White #100730
Garden Green # 102584
Christmas Postcard Stamp #121428
Stazon Jet Balck #101406(refill #102566)


Here is some of the materials I used. Forgot to put the GARDEN GREEN CARDSTOCK in picture:)
 I placed cardstock in folder, and put it thru the Big Shot. Roll to the back, and the back to the front (toward you) this will impress the pattern better.


Even looking like this, they came out looking nice.. But I really wasn't happy with the looks, I decided to take a step-up and lightly use stazon WHITE over the 3-D image.


So now its done and it looks funny and I feel like I just wasted my TIME and PAPER. Let's cover most of the card and leave alittle of the snowflakes.


Will use colored pencils on image. I have stamp'in Up colored pencils and they have retired the set. the other colored pencils I use all of the time - CRAYOLA. The best time to buy these colored pencils are when "Going Back to School" sales starts...

Used my dauber to go around the edges Used Garden Green . Next Designer Paper and Cardstock.


O.K -  Next: The green cardstock - Garden Green......


Used Whisper White And Garden Green to layer and frame out my card cover.


Added foam tape to give height image up on card.

Now to Color image.

Used Stamp in up color pencils (retired).

And the finally step was I added Dazzling Diamonds Glitter #102023 to the belles.
I also used tissue to smear the stazon. I guess the project over all turn out looking good, but like I said this was one of those cards that no matter what I did , I just wasn't satified no matter how I looked at it. Did you EVER have a card that was like this one. Would love to hear your story.....
Until next time - Happy Stamp' In !